Competitive Pokémon player, prolific tournament organizer and community founder—on the Pokemon Showdown battle simulator. Also a keen Nintendo completionist.
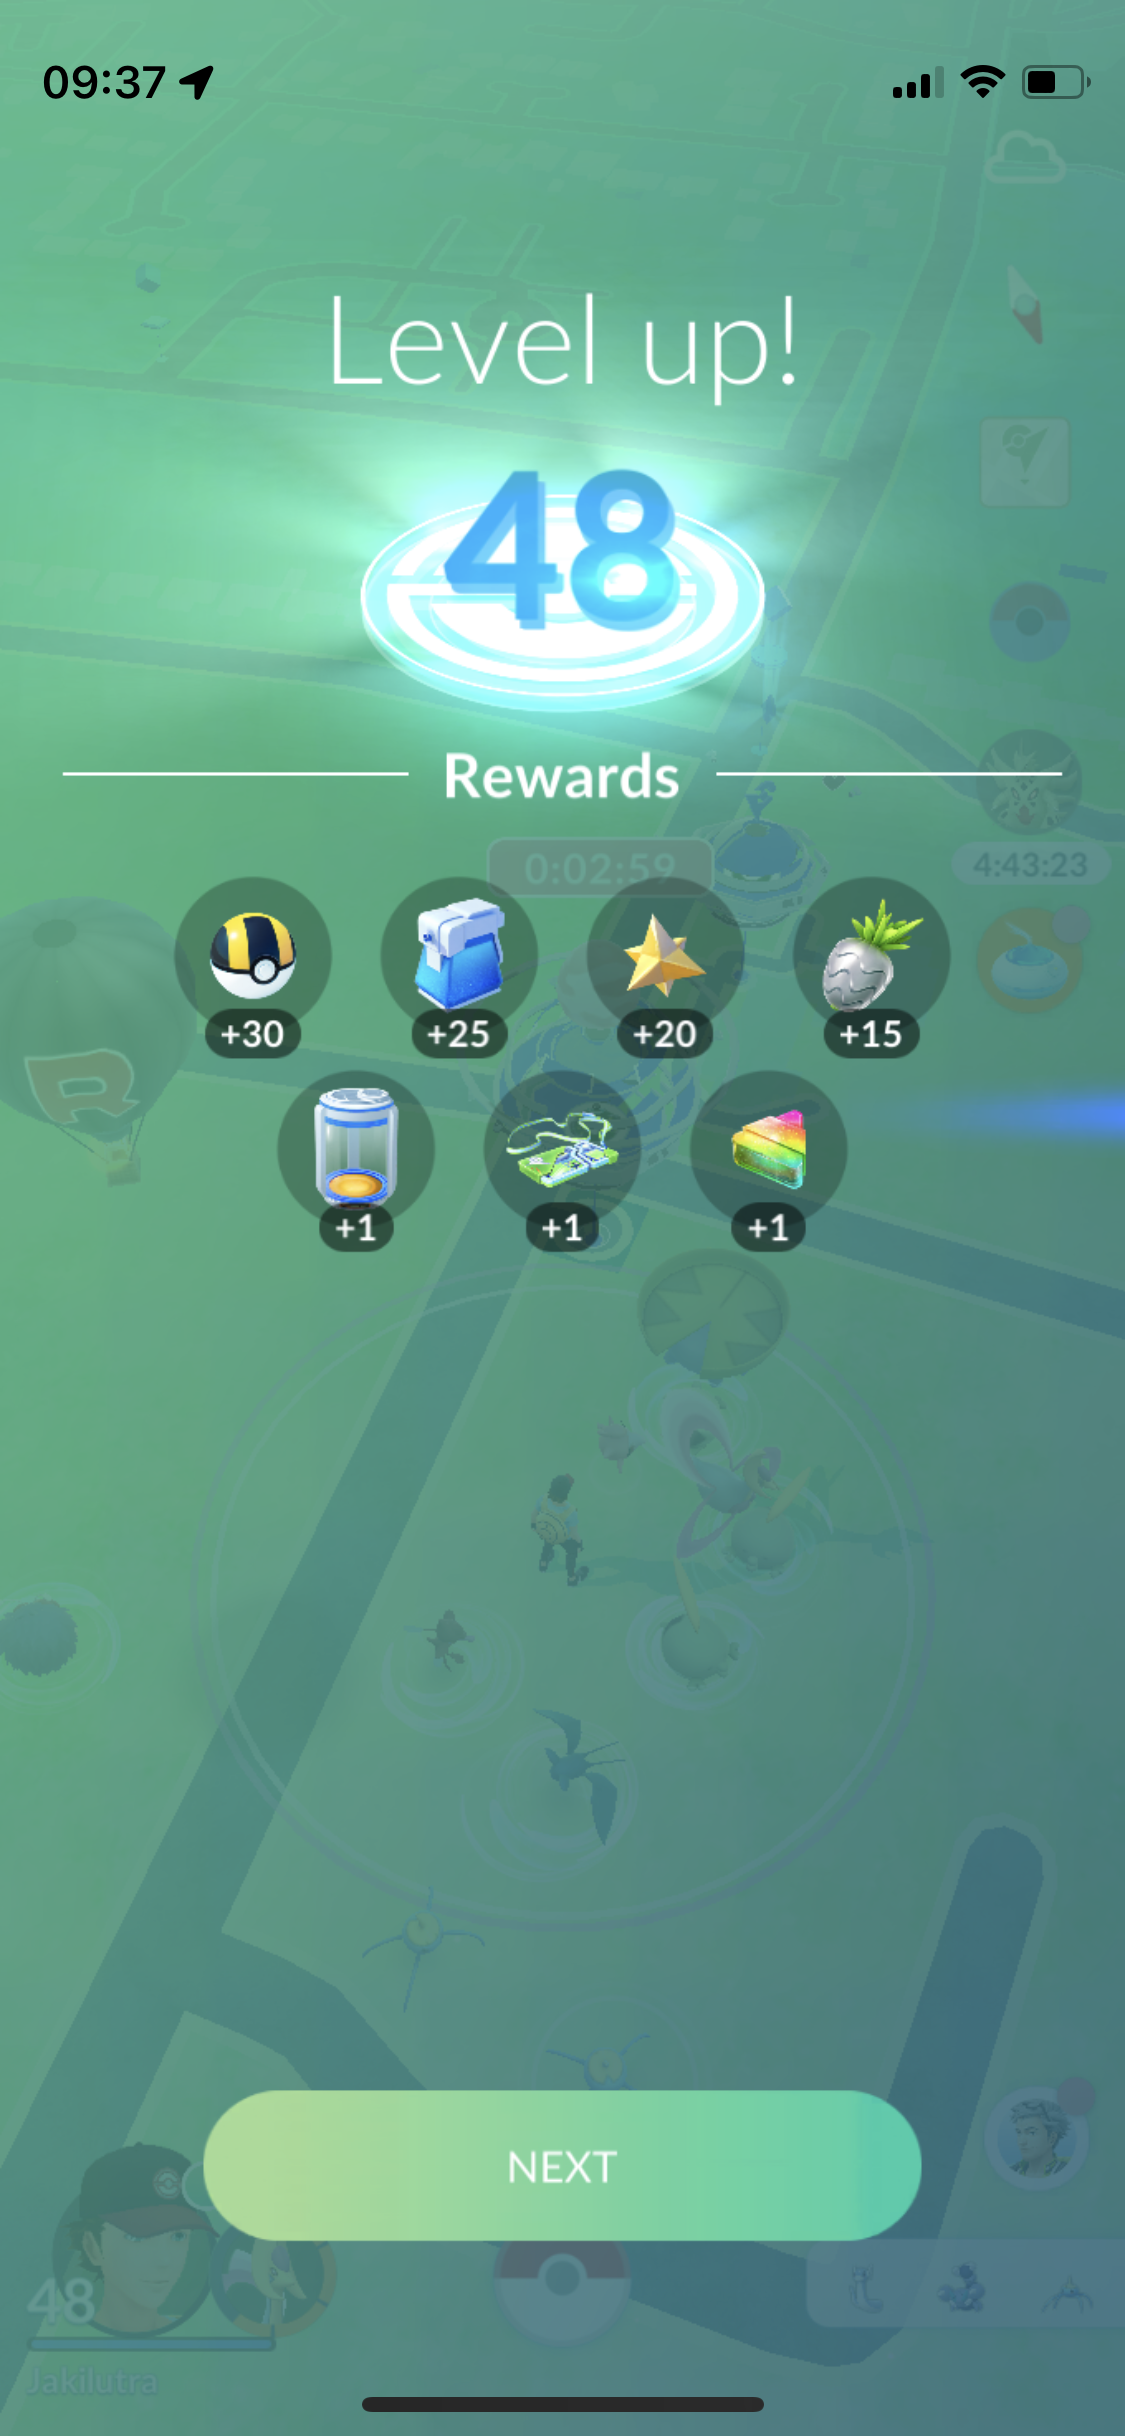
Today, I finally leveled up to level 49. Just a couple of days ago I had 30 lucky trades to go, but miraculously I managed to climb all the way up to 50 lucky trades during this boosted event.
It looks like level 50 won’t take too long. Only about 5 million XP and many excellent throws to go.
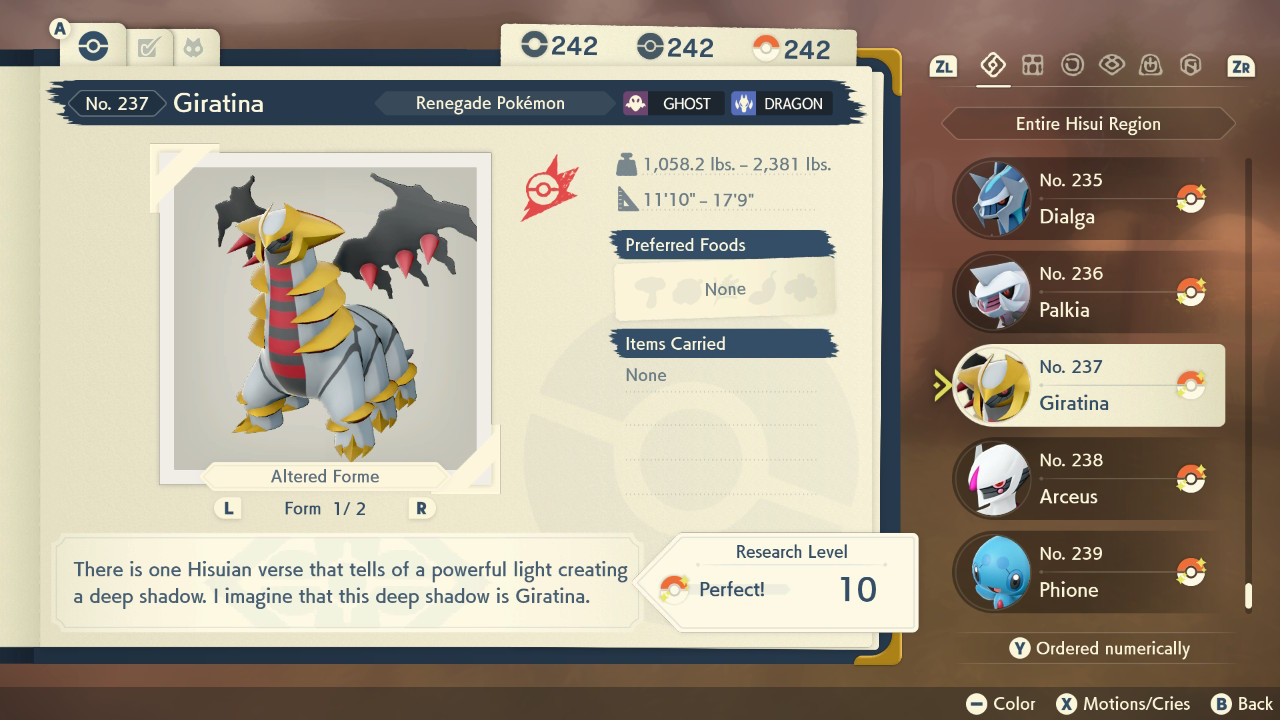
Finally, after over a year and a half after I started playing, I managed to get the motivation to finish perfecting the Pokédex!
With all that grinding, I also managed to master all the moves for all 4 maxed out Giratina.
I’ve got several options as to where I go next: complete the alpha living dex; complete path of solitude; max the research for another Pokémon; focus on my Shiny Dex; or collect minimum and other maximum sized Pokémon.
Path of Solitude is a tempting choice, and it would mean I increase my max living dex at the same time, which is on 32 species the last time I checked.
I’ve also made progress with alphas, with only 8 species and 11 forms left to catch; however, most of them are still in space-time distortions, so it could take a while. Perhaps I could grind moves with Palkia or Dialga while I wait for the distortions to appear.
I have over 60% of the Shiny species and over 50% of the Shiny forms now. With the perfect dex, it will now be easier to shiny hunt across the board.
I could try to hunt the larger than alpha Pokémon or investigate getting minimum sized Pokémon via HOME trading. I could also just spam catches in-game and hope I make progress that way. It would help with grit farming and hoarding more items. I currently have 35/60 items in my satchel maxed and 96/165 in boxes.
So there’s exciting routes to go down, but time will tell if I follow them.
I’ve been playing Super Mario Bros. Wonder since it’s release and I think I’m done with the game now. I have all six medals, an online rating of 99,999 (the maximum), and I’ve even left the save file with 99 lives, 999 flower coins and 99 (normal) coins.
Super Mario Bros. Wonder: Personal Bests
I’ve also had a decent go at trying to get good times (and score for credits) on the levels which save them. I can definitely improve them still, but they are hard to optimize and there’s many people better than me.
I may come back some day, but for now, I should be getting back to Pokemon and Zelda!
Quick update to say I finally got over 1 million in a mini-game. The highest scores tend to require fluke combos, and I happened to get an over 990k one, allowing me to reach the incredible milestone. I do want to get 9,999,999 one day, but I have no idea if it’s actually feasible.
3 days ago I finished beating every boss rematch in under 2 minutes, and I’ve finished uploading videos for them all today.
For Kleavor, Lilligant, Dialga and Palkia, they are also no damage runs (mainly because less damage means quicker time).
I’ve also mastered all the moves for my pseudo-alpha Giratina now.
Regarding my other progress: I have 212 (12 to go) species and 304 (19 to go) forms alpha. I also have the 10 home-exclusive alpha forms, such as regular Typhlosion. For shinies, I have 118 species and 139 forms shiny; and 4 of my shinies are exclusively alpha, while another 6 I have in alpha and non-alpha.
I’ve jumped up to 105 perfect entries, and 41 paths of solitude completed. For my maxed out count, it’s now at 26 species, 34 forms and 47 variants.
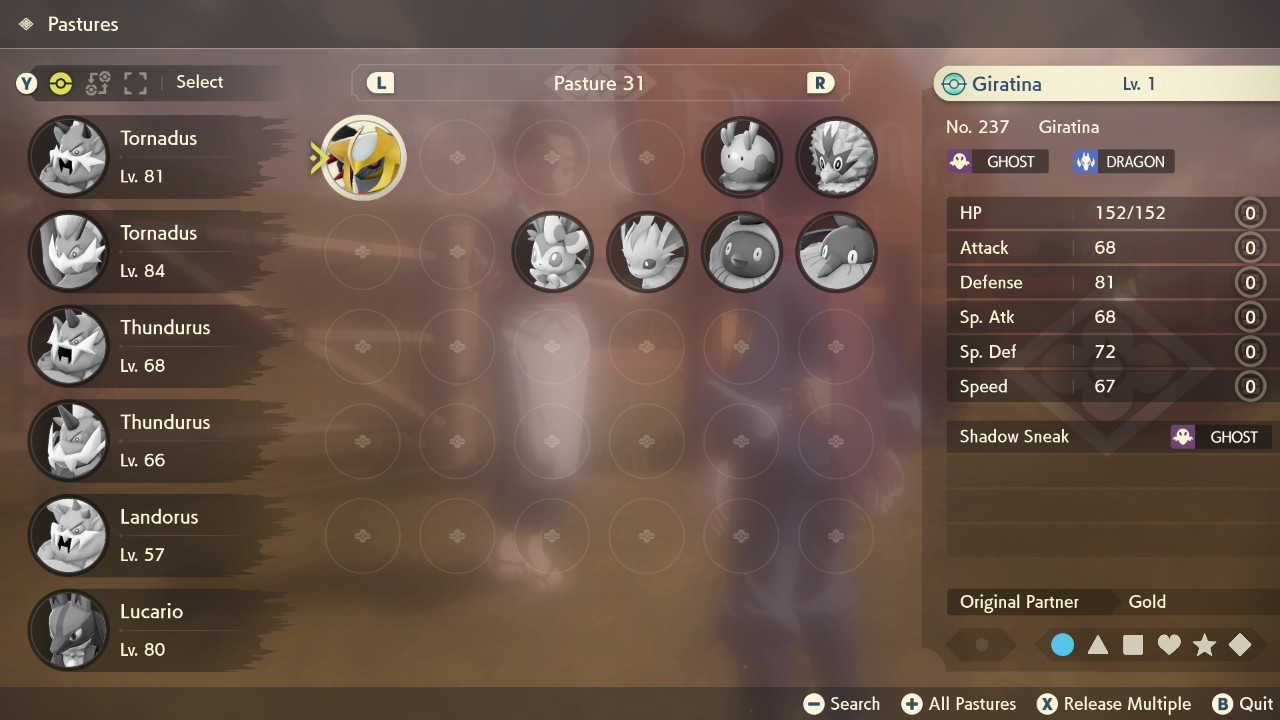
A brief progress update. I realized that the shiny Giratina I had transferred from GO a while ago was in fact the maximum size possible for Giratina in PLA, a pseudo-alpha. Once I realized that, I began thinking about how I could get a minimum size one, an omega.
I had seen information about Pokémon from previous generations being the minimum size when transferred to PLA, and once I began holding that thought, the Sinjoh Ruins event popped up in my mind. Not only did I have a chance of getting a minimum sized Giratina, but it could also be level 1!
I quickly began looking on the GTS, to see if I could get one. At first, the Pokémon they requested in exchange for a level 1 Giratina were impossible for me to get. I didn’t stop looking though, and after several hours, Zacian was requested, something I could easily obtain back. I rushed to trade and finally I had a Sinjoh Ruins Giratina in my hands. Next, I transferred into Pokémon Legends Arceus, and checked its dimensions. It was indeed a minimum sized Giratina. Remarkably, it also had only 1 move, and 0 effort levels all around. It was minimal in every respect.
Not only did I have living minimum and maximum specimens, but the other part of the Pokédex entry for Giratina was complete: perfect height and weight ranges! I also decided to buy every move for my level 100 Giratinas (one of them being the maximum one). The only thing I haven’t done yet now, is mastered the moves for all of them.
I guess the next update might be mastering all the moves for my maximum Giratina (and the other maxed out ones) now.
Following on from my 999 for Shadow Claw, I gradually 999ed the other move-related research tasks for Giratina.
Maximising Number caught was an interesting challenge though. The only way I believe it can be incremented past 1 is to receive a Giratina from a trade. Luckily, I already had another switch and an alt account, that’s in French/Metric to show off maximum and minimum sizes.
I had to buy another copy of PLA though, so I could trade Giratina back and forth. A trade takes roughly 50 seconds, so it’s over 13 hours in total to do 1000 of them. I split them into 20 periods of 40 minutes each so I didn’t get too fed up, and watched anime at the same time I was pressing the buttons.
I finally achieved the final 999 today!
As for other progress, I’ve got 211 (13 to go) alpha species and 300 (23 to go) alpha forms; 103 shiny species and 120 shiny forms; 3 of my shinies are exclusively alpha, while I have 6 others in alpha and non-alpha.
I have 64 perfect entries and have still only completed 35 paths of solitude. I now have 19 species, 27 forms (I believe the last post counted a shiny by mistake) and 33 variants (including shinies) maxed out in total.
My next post will either be completed alpha or perfect Dex.
For my final week of post-production, I started with making it so that the enemy would have to be in camera before it moves, since the red enemies were all stuck to the wall before I got there.
I had already done the check in the teleport code. It was just a case of copying it, and testing it. I changed the upper limit to 1.2 to make them see the player a bit beyond the camera view.
Figure 2: In-camera view demonstration
Next, I thought a lot about how the blue layer part was going to go down. I had this idea that the enemies would be trapped behind walls as you go past them, and then you’d face the final boss. I even considered making the player sprites trapped in these walls, to make it look the final boss was imprisoning them.
Instead, I decided to make the blue move-through-wall ability out in the open and upon collecting it, it’d release lots of big enemies. These enemies would be of scale 4, bigger than all the rest, 5 of them red and one of them blue (which had more HP and stronger attacks). So it would be a great challenge unless you used the new broken attack I decided to pair up with the blue ability upon pressing E!
Basically, the player fires out of every one of its vertices 5 times. It took quite a bit of trial and error to work out the correct rotations and vectors to use, but suddenly when I used AngleAxis, everything started to work!
Figure 4: The E-Attack and the Blue Enemy Layer
For the walls that would disappear, I gave them a different tag, and then accessed the deactivate method I made in the Game Manager to loop through all the walls and set them as inactive game objects.
I also made another teleport point, this time with typing “3” and the new co-ordinates.
Figure 5: The Final Bird’s-eye view of the level.
Finally, with the blue teleport ability acquired, it was time to design the final boss. Initially I made it size 5 and tried to make it have an attack come out of every one of its vertices. I didn’t really have enough time to figure out the attack, so I went with it using a similar attack to E coming out the single point, and left in the ability for it to fire when it does the spinning block, as it produced a cool wave effect. I varied the speeds of both the spin attack and non-spin attack to get the right stength in each.
As you may have seen, I also changed the enemy update code, so that a certain number of attacks decrease them in size repeatedly, not just once. The boss fight was too easy at scale 5 if the E Attack is used, so I set it to scale 7.
Upon defeating the boss, I made it spawn a yellow ability collectible, which would take you to the game win screen. I also made another checkpoint to reach the boss.
Figure 8: Final Boss
With the development completed, I feel satisfied. There’s lots of more I could have done to make it more engaging, and look better visually, but it takes time. This was my first time on Unity. I’m sure I can accomplish more next time with the Unity engine knowledge I’ve acquired.
I also played it very safe with coding this time, because I was learning C# and the engine; perhaps I could try to master the arctan2-related maths next time and not just do the odd line with trial and error.
Figure 9: Post-Production Summary Video
Finally, I put together my video presentation. That’s all for this project!
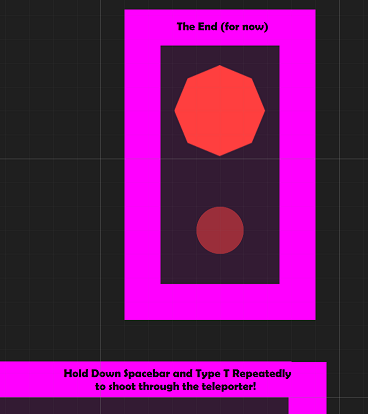
During Week 11, I completed the red enemy layer of the level as well as introduced a screen overlay.
Figure 1: End (Teleport Area) of Red Enemy Layer in my Project in Unity.
First, off I worked on the far right side of the red enemy layer, past the three big green enemies. I wanted to introduce an interesting mechanic, the ability to teleport shooting. The idea is the enemy will move toward the player and cover the teleport zone. Then it’s a case of holding down spacebar and firing with T. Logically, you’d probably be pressing them simultaneously, but that’d make the code a bit more awkward to detect the correct response. Since I had the teleport set to pressing down T, I just added the extra condition like so:
The code prior to this was just transform.position = teleporterLocation; so it was a case of surrounding this statement with this alternative, and triggering the fire method in the AttackScript. One thing to note is the player position had to be substracted (transform.position) to nullify things because the formula in the attack script adds the player position.
Figure 3: Teleporter Shooting in the Green Teleporter.
Even though the red teleporter forces you to use the mechanic, the green teleporter is actually a better demonstration because it has more space around it.
Next, I worked on implementing a checkpoint for the start of the red enemy layer. I just wanted a different button combination to allow you to restart at the new location. After a lot of trying, I learnt that the scripts would all just reload when reloading the scene, so I settled for pressing down a key at the very start of the level, giving a second to press it. If the player missed that second, they could just restart again, so it wouldn’t be much trouble.
I constructed this code, most of it just reloading the data I want, and the main things being the keycode check and the teleporting to the start of the red layer. restartTime is initalized in the start event.
After this, I worked on the blocking mechanic. I thought through different ways it could work, including increasing/darkness brightness, but I came to the conclusion the most effective way would be a rotation in the z-axis (constraining to the x-y plane). Because both player and enemy are pointy shapes, it gives a nice circular-saw-like effect with a fast rotation.
Figure 5: Blocking demonstration in my Unity project.
The logic was fairly straightforward, it was just a case of tweaking the time the block and the rotation was active for. While the block (boolean) was on, the player or enemy couldn’t take damage. I also made a timer count down, which at a certain point, would turn the block off; but it would also count down until the next availability of the block. Red Enemies and Blue Enemies would just use the block whenever they can, while Green Enemies couldn’t use it at all. The only problem I really had is that I checked for the inverse boolean by mistake in the player/enemy damage code. Once I realized what I had done, it worked as expected.
The final thing I developed this week was the long-awaited health and points overlay. I went back to try and figure out what to do. Luckily, I actually worked out what to do in not much time. I set an image as a child object of the canvas object and realized if I varied the position and size for the rect transform, it did actually cover the screen where I wanted when I went into play mode. The overlay didn’t look nice opaque, so I made it black but with a decent amount of transparency, close in colour to the dark floor.
For the text object, I just copied the position and dimensions that I had with the image. It seemed to work great, now I could start with whatever text I wanted. But I also wanted to edit it as updates happen throughout the game: when an enemy is defeated, when an ability is collected and when consuming health.
This information from the Unity Answers forum helped me. I needed to include UnityEngine.UI and get the Text component. Then I could just make a method to fill the text with whatever I wanted.
The first line was the health line, the red hearts equating to the damage the player can still take, and the grey hearts equating to the red hearts lost from the maximum amount. I did decide to actually change the health to 5 in the end. My compromise was that the health consumables would only give 1 health back, 2 in the level or 3 back from a bigger enemy, not totally restore health.
The second line was the points, which would be added to when defeating the enemy. I added this in the enemy script:
It just varies based on the enemy colour and size for now.
The third and fourth lines were the ability collectibles. I wasn’t able to find decent green/red/blue symbols, but luckily I discovered you could use rich text and color tags to colour the symbols, so all I had to do was find a square and circle symbol.
I made sure to call the UpdateOverlay in all the necessary places and it now worked! But there were still 3 problems.
When building the game for WebGL, the symbols wouldn’t display because I think chrome’s default font is not arial, which I based it around. It took me a while to find out the solution, but using this information from the Unity Community Forums, and a lot of testing, I realized I needed to include the arial font file in my assets and also call it in the script, to change the font.
The second issue was that it was hard to read my overlay. I had moved it closer to the centre, but it looked awkward. I booted up the Christian Whitehead Sonic the Hedgehog mobile port and realized my text wasn’t big enough. It had to be very big. Once it was very big, I could move it over to the corner and it could be read fine.
The third problem was that at the start, there were no abilities, so the lines weren’t included for that, but the background was still big. I had to work out what properties I needed to alter for it to adjust appropriately. I had to anchor the rect transform to (0, 1) also (top-left corner), otherwise it’d move when switching between maximized.
With all that considered, I stored the original size delta, which would I restore at the beginning of the method, and then subtract the appropriate height if none of the move-through-wall or teleport abilities were collected.
Finally, I had a great looking (relatively speaking) overlay!
Figure 9: Playthrough demonstrating the health and points overlay in my Unity Project.
Next week will be the final week of post-production. It will be time to do the final blue enemy layer, and some other final improvements, before looking back at the project.